
Integrating Your Microsoft Outlook Email Account with TrustWorks
At TrustWorks, we prioritize consistent, professional communication with your clients. By default, emails sent from the platform are dispatched from no-reply@trustworks.io.
To better align communications with your organisation’s branding and processes, TrustWorks allows you to send emails directly from your own Microsoft Outlook or Office 365 mailboxes.
This guide explains how to integrate your Outlook email account with TrustWorks using OAuth 2.0, ensuring secure and seamless email delivery.
🔒 Prerequisites
Before configuring the Outlook email integration, please review the requirements below.
Authenticated SMTP (Required)
To send emails via either a user mailbox or a shared mailbox, Authenticated SMTP must be enabled for the mailbox.
This setting is mandatory, as it allows TrustWorks to securely authenticate and send emails on behalf of the mailbox.
How to enable Authenticated SMTP:
- Open the Microsoft 365 admin center
- Go to Users → Active users
- Select the user and open the Mail tab
- Under Email apps, select Manage email apps
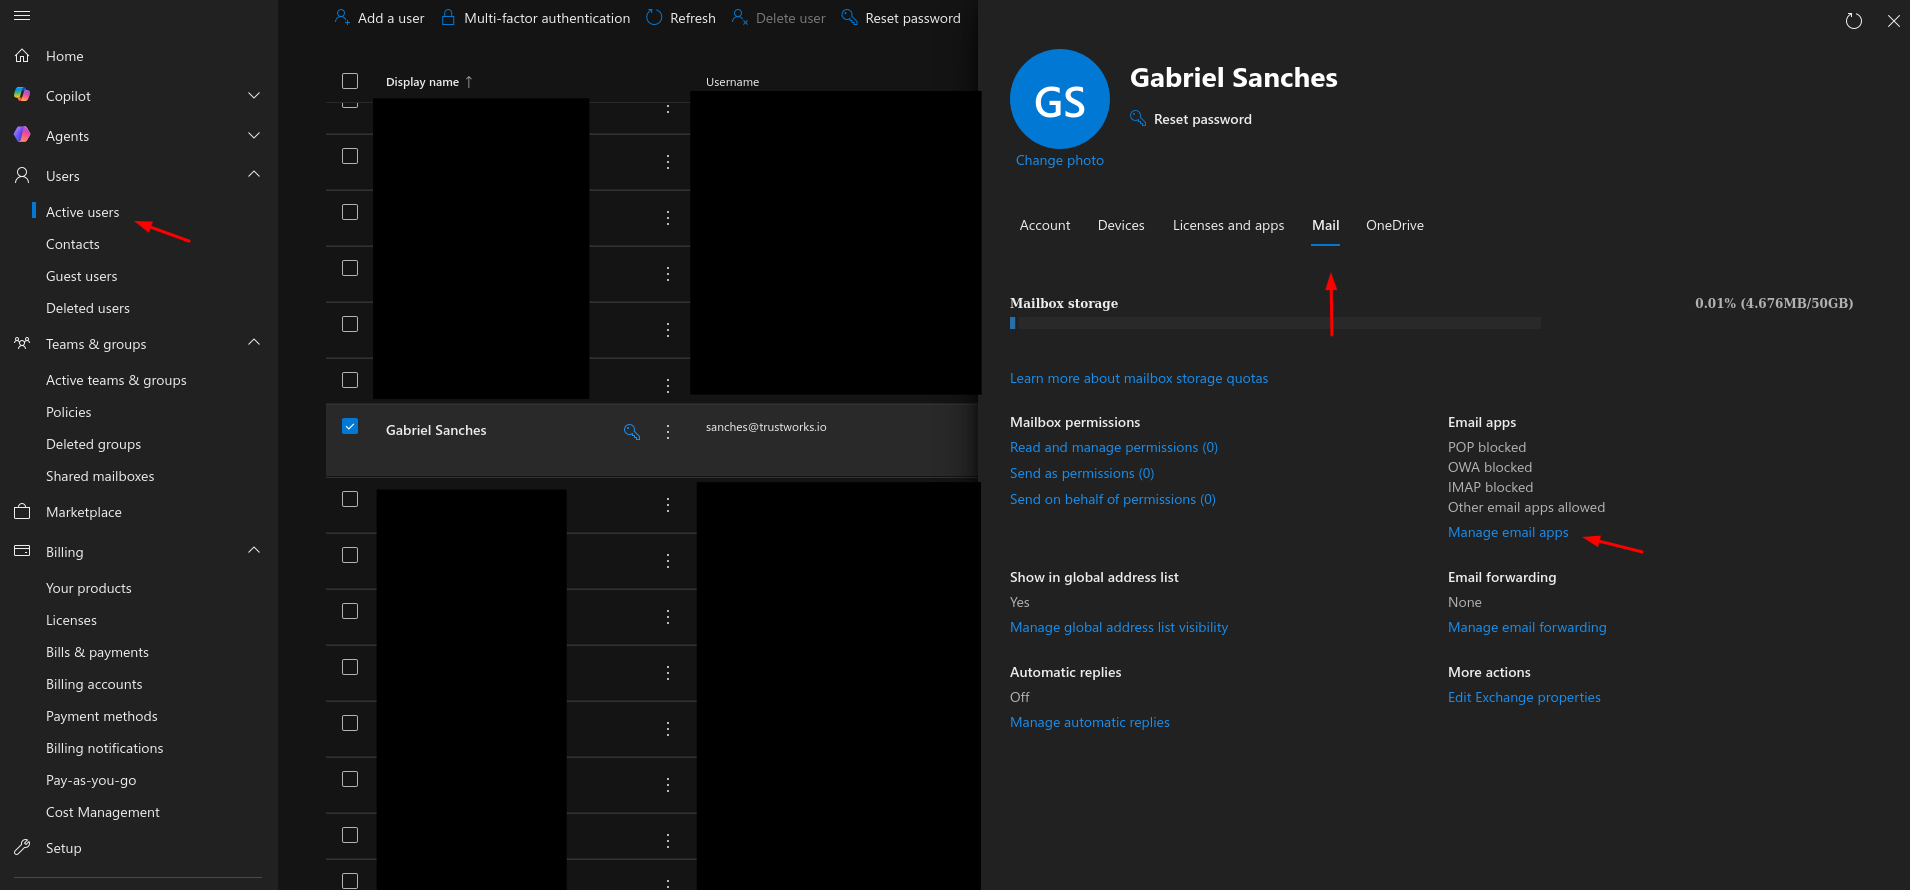
- Ensure Authenticated SMTP is enabled
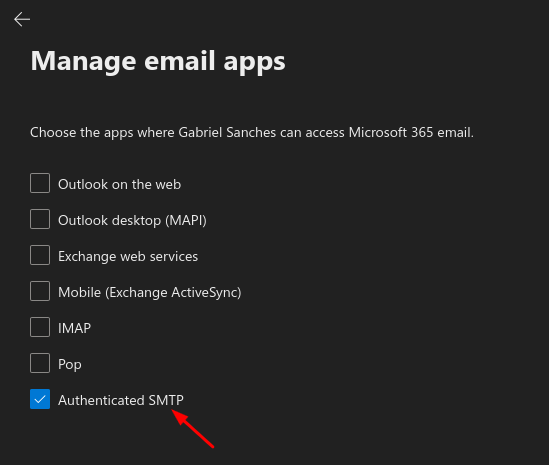
- Save your changes
👉 Microsoft guide:
Configuring Integration with a Shared Mailbox
TrustWorks supports two integration methods for shared mailboxes:
- Direct Login: Log in to TrustWorks using the shared mailbox credentials, and set the sender address as the shared mailbox email. In this scenario, "send as" permission is not required.
- Delegated Access ("Send As" Permission): Log in with a user account that has been granted "send as" permission for the shared mailbox. Set the sender address as the shared mailbox email address.
Choose the option that best suits your organization's requirements.
How to Enable “Send As” Permission for Shared Mailboxes
To grant "Send As" permissions to users for a shared mailbox:
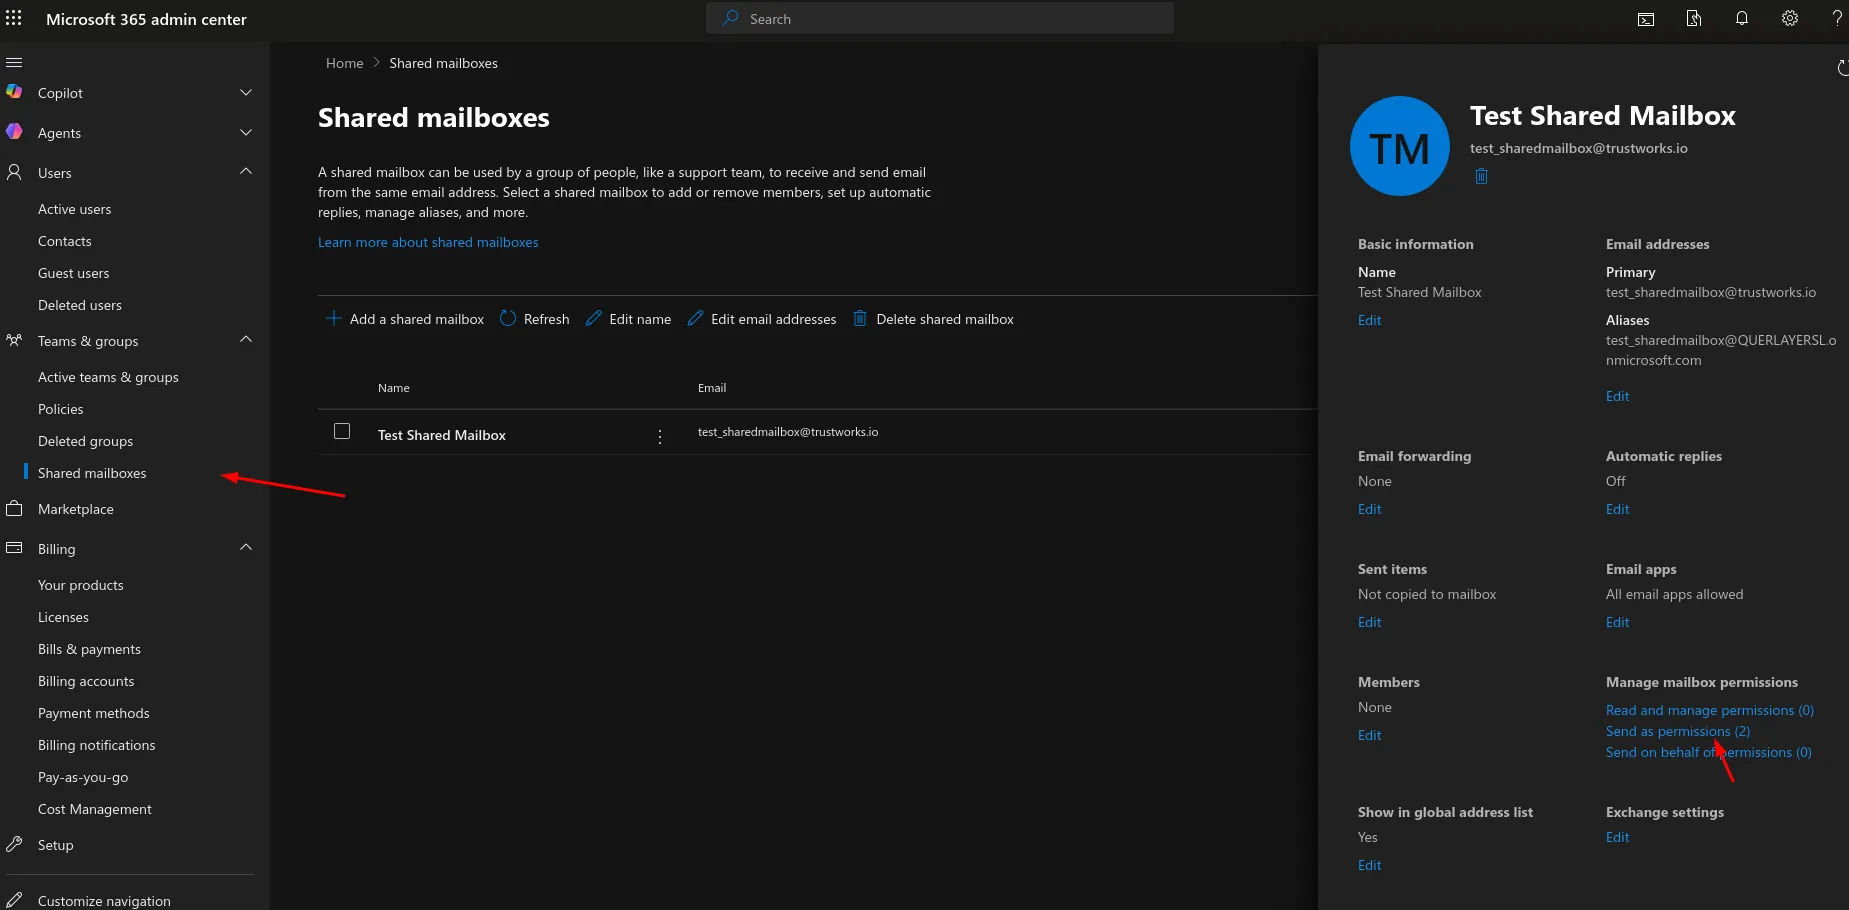
- In the Microsoft 365 admin center, go to Teams & groups > Shared mailboxes.
- Select the shared mailbox you wan to configure
- Under Manage mailbox permissions, configure Send as permissions
- Add all users who require "Send As" access to the permission list.
Make sure these permissions are fully applied before continuing with the TrustWorks configuration.
⚙️ Configuring Your Outlook Email Integration in TrustWorks
Add Email Connection Details
- Log in to your TrustWorks account.
- Navigate to the Integrations section and select Email as the integration type.
- Select the Authentication method - OAuth 2.0
- Enter the following connection details:
- SMTP Server Address: e.g.,
smtp-mail.outlook.com - SMTP Port: e.g.,
587(use this port for TLS/STARTTLS connections) - Sender Address: The email address that TrustWorks will use as the sender (this may be a user mailbox or a shared mailbox address).
- Sender Name (optional): The name you wish to appear as the sender in your emails.

Connect via Microsoft OAuth 2.0
- Click Connect via Microsoft to authenticate your email account.
- You will be redirected to the Microsoft login page. Sign in using an individual Office 365 user account or a shared mailbox.
- Grant the required permissions to allow TrustWorks to send emails on your behalf. Once authentication is complete, you will be redirected back to TrustWorks.

Test and Save the Configuration
- If successful, click Save.

Configure the communication channel
Your Outlook email account is now integrated with TrustWorks, and you can select it as your sending address within the workflow builder when configuring the communication channel where applicable.

You can also swap the mailbox for all Data Subject Requests (DSRs) related communication in Settings > Privacy Center > Widgets.

Integrating your Outlook mailbox with TrustWorks not only streamlines your communication process but also reinforces your brand's presence in every email you send. Should you encounter any issues during the integration process or have further questions, please do not hesitate to contact our support team for assistance.